Uniden Laser Pico Projector ULP-1000 (Microvision SHOWWX)
Written by Vlad on January 22, 2011 – 7:36 pm - 6,067 views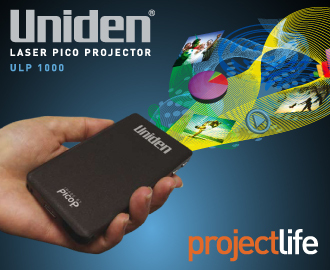
Imagine a portable projector, as small as an iPhone, that can project a sharp widescreen image onto any surface and does not need to be focused. On top of that, it can run for 90 minutes from its internal battery.
I bring you the Uniden ULP-1000, which is sold in the USA as the Microvision SHOWWX Laser Pico Projector.
Although the official Australian retail price is $999, I got it on special from CatchOfTheDay.com.au for $300.
Why I Bought The Laser Pico Projector
As part of my work and other interests, I often give presentations using a computer. I already have a Dell 1609WX widescreen DLP projector. It’s great little box that produces a beautiful bright image, but it’s not that convenient to use on the go:
- You have to connect it to mains power via an extension cable. Mains outlets are hardly ever in the most convenient location.
- To project the image, you need the venue to have a large white wall or an existing projection screen. If they don’t have a screen, I have to bring my portable screen with me. This screen requires assembly and disassembly and is even more weight to carry
- You need to spend time adjusting the image
- The projector gets very hot and takes a while to cool down
- The bulb needs to be replaced when it starts to go dim (usually 2000 hours) and replacements cost over $200.
I have read about a few battery powered projectors that use LEDs to produce light, but virtually all reviews were very negative, complaining about how dim they were and how poor their battery life was. The Uniden ULP-1000 Laser Pico Projector is the first battery powered device I have seen overcomes many of these limitations. As it uses laser beams instead of LEDs, making it more efficient in its use of energy to produce light. Also the image is in focus at any distance – there is no focus setting to fiddle around with, and you can use almost any surface as a screeen – even the back of a person wearing a light-coloured shirt!
How the Laser Pico Projector Works
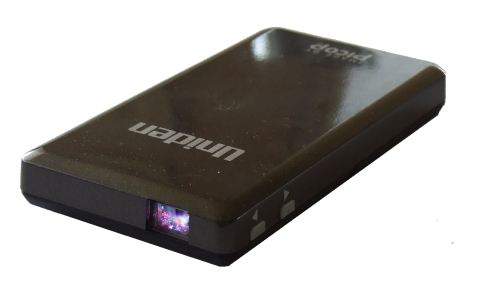
This projector uses three coloured lasers – red, green and blue – to paint the projected image line-by-line onto any surface, like a wall or projection screen.
The intensity of each laser beam is independently controlled to set the colour and brightness of each pixel. For a black pixel, all lasers will be momentarily turned off
The ouput of the three lasers is combined into a single beam and then a tiny MEMS (Micro Electromechanical System) silicon mirror reflects the beam onto the screen. Basically, this is a tiny mirror built into a silicon chip, that can be steered electronically. It is very accurate and makes makes barely any noise, even with an hear pressed against the projector.
Due to the fact that the lasers are almost perfect monochromatic light sources, this produces a broader colour gamut than all other display technologies on the market today, i.e. it will produce richer colours than your monitor.
Laser Pico Projector Specifications
Let’s get straight down to business:
| Native Resolution: | 848×480 |
| Supported VGA resolutions: | 848×480 (WVGA 16:9 aspect ratio), 800×400 (2:1 aspect ratio) and 640×480 (VGA 4:3 aspect ratio) |
| Brightness: | 10 Lumens |
| Contrast Ratio: | Exceeds 5000:1 |
| Refresh Rate: | 60 Hz (nominal) |
| Throw Ratio: | 1:1 (projection distance/image diagonal) |
| Image size: | 150 mm to 2500 mm (6 in to 100 in) |
| Projection Distance: | 150 mm to 2500 mm (6 in to 100 in) |
| Height: | 14 mm (.55 in) |
| Width: | 60 mm (2.36 in) |
| Length: | 118 mm (4.64 in) |
| Weight (with battery): | 122 g (4.3 oz) |
| Laser diode specs: | 642nm AlGaInP 90mW (red), 532nm Frequency Doubled IR 60mW (green), 442nm 50mW GaN (blue) |
Package Contents
The Laser Pico Projector comes with the following:
- The ULP 1000 Laser Pico Projector
- 1300mAh rechargeable Li-ion battery
- AC Power Adaptor – provides 5V DC at 1.6A via a Micro USB connector
- USB cable with Micro USB connector – allows you to charge/power the projector from a USB port or other portable USB charger
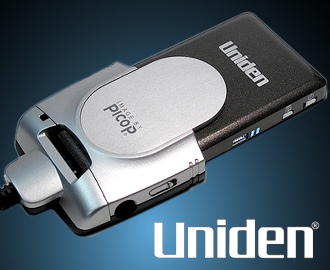
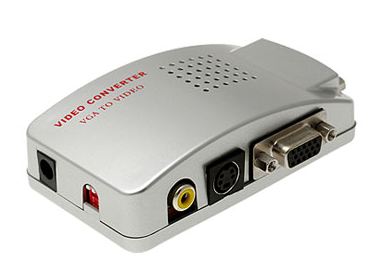
- VGA 1000 Dock – a metal enclosure with a VGA cable to allow you to connect the projector to a PC or laptop. The VGA dock also has a tripod mounting screw at the bottom
- Component cable for iPod – allows you to project movies and images from various Apple iPods and iPhones with a dock connector
- Composite video cable (RCA female) – can be connected to a Set Top Box, Games Console or any other device with an analogue PAL/NTSC composite video output
- Storage pouch
- Wrist strap
Using the Laser Pico Projector
Using the projector is usually a matter of connecting a video input and pressing the power button. It takes about 25-30 seconds for all the lasers to start up and reach peak brightness.
Video Inputs
The projector accepts three different video inputs:
- An RCA female adapter cable lets you connect TV Set Top Boxes, video cameras and digital cameras with PAL or NTSC composite video output
- The VGA 1000 Dock connects to any Desktop PC or laptop with a 15-pin VGA output port
- An Apple Dock Cable, which can be connected to various models of Apple iPhone, iPads, iPod Touch and iPod Nano
The projector can be held in your hand or placed on a flat table. If you are using the VGA Dock, you have the added option of attach it to a camera tripod with a standard screw mount.
Powering the Laser Pico Projector
The manual states that it can run up to 90 minutes from the battery, but I have not done an endurance test. If you are playing a movie greater than 90 minutes, I would connect external power. Using the On-screen menu, you can check the remaining battery life.
Although it comes with a bundled power adapter, you can also charge the Pico Projector using a Micro USB cable connected to a standard USB port. Note that a standard USB port or charger can only supply 500mA tops, compared to 1600mA from the bundled adapter, i.e. charging will be faster with the bundled adapter.
Adjusting the image
On the front left, there are two quick adjustment buttons:
- Color mode – The default is “brilliant”, but if you feel that the appearance is too pastel-like, you can change it to “standard”. You can also select “inverted”, which produces a negative. This is useful if you are giving a presentation using black text on a white background. Reversing the colours will make it much more readable.
- Gamma correction – You can select low, medium or high. The default is high.
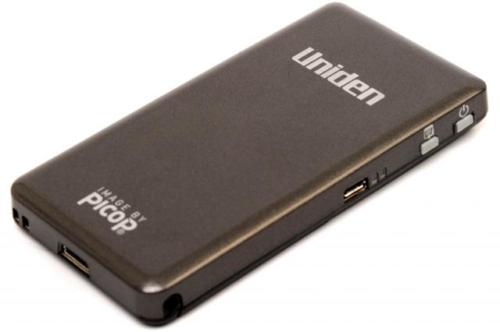
On the front-right (shown above) is the power and on-screen menu button. Through the on-screen configuration, you can also make the following adjustments:
- Aspect ratio – the default is widescreen 16:9, but you can force it to 4:3. There is another setting called “Zoom” that I have not tested.
- Image and colour calibration – This brings up a cross-hair that allows you to correct the alignment of the laser beams, if you ever find that the image is not sharp or that the colours are separating. For me, the fault settings were perfectly fine.
A Photo of the Projector in Action

To give you some idea what it looks like, I connected the Laser Pico Projector to my Asus EEE PC 701SD and took a photo of a paused frame from the Youtube music video “Evacuate the Dance Floor” by Cascada.
I projected the image onto the white ceiling in my bathroom. In order for get a good image on my Fuji FinePix F30 digital camera, I had to turn off the lights and close the door. The image was taken in macro mode with a shutter speed of ISO400 with an exposure time of 0.25 and an F-stop of 2.8.
My new tripods that I recently ordered had not yet arrived, so I had to lie on the floor holding the projector in my left hand and the camera in the right. I kept my hands as steady as I could, but it still cannot compare to the stability of a tripod.
Also, the Youtube video was the lower resolution 360p version and not the High Quality 480p version. I just realised that now, but I really don’t want to lie on the bathroom floor again to retake the picture.
I have not performed any enhancement of the image, but I have cropped the frame. Despite these less-than-ideal test conditions, I still think the picture looks bloody good.
Advantages Of the PicoP Laser Projection Technology
1. Always focused
No bulb replacement
Although laser diodes do have a lifespan, it is a lot longer than bulbs. It is commonly quoted as being in the tens of thousands of hours, depending on the temperature of the surrounding environment (cooler is better) and if the laser diode is being used continuously or intermittently (intermittent is better). For a device like this, the lasers would almost certainly be still in good shape long after the owner decides to upgrade to something better.
2. Virtually silent
There are no noisy components like cooling fans or DLP colour wheels. That is a real benefit when watching movies. Also, this means that there are fewer components subject to wear and tear that could fail.
3. Even brightness around the whole image
All projectors that use bulbs struggle to produce a consistent brightness around the whole image. The reason why projector bulbs are so expensive is because they are precision engineered to produce the most even illumination that they can, but it’s still far from perfect, due to the shape of bulbs and their filaments.
As the laser projector paints the image line-by-line, the brightness is identical at all points.
4. No DLP rainbow effect
All but the most expensive DLP projectors use a single chip with a spinning colour wheel. This mechanism produces an infamous artifact known as the “rainbow effect”, where some people can see a separation of the colours that make up a frame, resembling a rainbow-coloured blur. This is most noticeable when viewing a fast-moving object or flicking ones’ eyes across the screen.
As the Microvision PicoP laser technology that is used in this laser projector combines its three coloured lasers into one beam, all the colours of the projected image are painted in one go, preventing any motion-based colour separation.
5. No LCD screendoor effect
In most LCD projectors, you can see the boundary of each pixel, which appears as a black square. A projected image can look like it is being viewed through the wire mesh of a flyscreen.
As the laser projector paints each line in a continuous sweep, there is no pixel boundary on each line. There is however a small gap between each line, but the laser projector fills this in by automatically raising and lowering the vertical position of each line on each screen refresh, so it is barely noticeable.
6. Wide gamut with saturated colours
As previously mentioned, the gamut of laser projection beats that of all others, especially LCD, but DLP is a close second. The gamut of LCD projectors is limited by the spectrum of the backlight and the filtering characteristics of the LCD panel.
7. Blacker blacks
In order to produce a black pixel LCD projectors must filter out the red, green and blue components of the backlight. This is hard to do, and a bit of light still gets through. DLP projectors are better in that they are able to reflect the light from that pixel away from the colour wheel, and the laser pico projector simply turns off the lasers when painting, or rather skipping over, the black pixel.
8. Any light-coloured surface will work as a screen
The best surface is of course a white surface, but even a a light-coloured surface will work fine. This is because the surface is reflecting three monochromatic beams, rather than a continuous spectrum, so slight changes in the absorption of a single colour by the surface are hard for the human eye to notice.
Limitations
1. Requires darkened room
The total light output is only 10 lumens. If you are outdoors or inside an office with fluorescent lights, the image will be washed out. Turn the lights off and close the curtains.
2. Speckled light
Due to the nature of laser physics, all laser beams produce speckled light. For example, if you shine a laser pointer at a wall, you will see that the light shimmers with a mixture of bright spots and dark spots.
If you are projecting an image at a close distance, i.e. less than 50cm, you will probably notice the speckled light. Further away, it is barely noticeable.
3. Slightly bowed edges
The ideal projected image will form a perfect rectangle. With the Laser Pico Projector, each edge is slightly bowed inwards, but it is even on all sides and was not severe enough to bother me.
4. Green Line beneath image
There is a faint green line underneath the projected image. The official Microvision SHOWWX FAQ states that this is used for calibration. I notice it, but it doesn’t bother me.
5. Battery life
90 minutes is enough for most presentations, but it might conk out if you are playing a movie. Your options are to connect it to a USB charger or even the portable solar USB charger I wrote about in a recent article.
6. Maximum Resolution is 848×480
This is WVGA (Wide VGA), which supports a 16:9 aspect ratio. It Can also display in 640×480 for 4:3 (Normal VGA).
If you are a high definition TV aficionado who enjoys watching 1080p movies, you may lose some fine detail. Youtube videos and Standard Definition TV will be fine.
Powerpoint presentations should also be fine, as they usually have large fonts. Word documents and PDF files could be hard to read unless zoomed in.
7. No HDMI, DVI or CVBS connectors
If you are using the laser projector with a laptop or notebook, most still have VGA connectors. As the maximum resolution is only 848×480, the VGA standard will handle this perfectly well without any signal quality issues.
If you are using it with a Set Top Box, it would be better to have component video rather than composite video, so this is a limitation.
I do note that when the Laser Pico Projector is connected to the the iPod dock connector, it uses the signals S-Video Chrominance and S-video Luminance, so perhaps it would be possible to create an S-Video adapter for the Laser Pico Projector. If so, this could achieve an additional improvement in picture quality when connected to a Set Top Box or RF modulator with S-Video output.
8. 60 hz refresh rate
The image is repainted on the screen 60 times per second. In one sense, this is much like old VGA CRT monitors which used to flicker, but I do not notice it with the Laser Pico Projector.
Examples of Things You Can Do with the Laser Pico Projector
- Travelling businessmen giving presentations
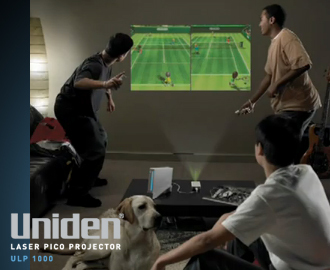
- Playing multi-player video games on a games console, e.g. Xbox 360 or Nintendo Wii
- Watching movies in bed on your ceiling. Your neck will be in a comfortable position
- If you are camping or in a location without mains power and need to entertain yourselves, you can use your tent or towel as a screen
- Showing a movie if you are on a tour bus, long distance train ride or aircraft without an in-seat entertainment system
- The official Microvision SHOWWX FAQ
- This discussion thread on LaserPointerForums.com has very detailed user experiences with the Laser Pico Projector:
- The following is an official demonstration video:
More Information:
Tags: iphone, ipod, laser, microvision, projector, showwx, uniden
Posted in Computer Hardware, Consumer Electronics | 2 Comments »


By anon on Jan 24, 2011 | Reply
wow this is a very comprehensive review! thanks – one of my main concerns was that you could not charge it while it was in use, but it seems you can via usb. Had I known this i probably would have purchased one.
How would you say it performs in an average room in your house? do you still need to turn off all the lights/close all the curtains?
Thanks!
By Vlad on Jan 24, 2011 | Reply
The more ambient light you have, the closer you need the screen to be.
Right now, it is midnight here in Sydney and I am in a room illuminated by a 200W halogen tube. Using the laser pico projector, I am getting an acceptably bright image on a white surface roughly the size of A2 paper (42cm × 59.4cm or 16.54″ × 23.39″). Using Pythagoras’s theorem, this roughly corresponds to a screen size of 28.6″.
People like big screens, so with a large audience I would always close the curtains and turn off the lights to try and project the biggest image possible.